So some teenagers decided to have fun one night & roam the neighborhood. Unfortunately, your car was at the receiving end of their “fun”.
If someone egged your car, you will be stuck wondering how much damage this has done to your vehicle and what your options are for cleaning/repairs.
Table of Contents
Can Eggs Ruin Car Paint?

Unfortunately, egged car damage is very common. They are the weapon of choice for vandalism of cars & the problems they cause are numerous.
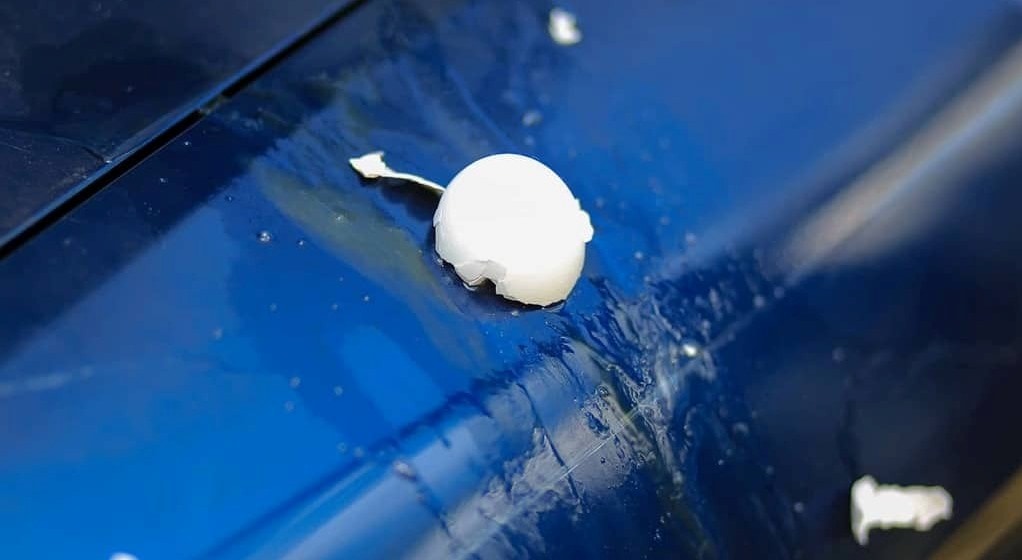
Egg whites, once allowed to dry, have similar properties to glue. Egg whites will dry to a hard, chipped material that will latch onto your car’s paint and cause it to peel. The fats in egg yolks will eat through your clear coat.
In some cases, lighter-colored cars can actually be stained by the yellow in the egg yolk.
Once the egg makes contact with your car, the amino acids present in the whites and the yolk will start to dissolve and eat into the paint. This is called “crazing” and will leave you with several small scratches in the shape of a circle.
Also, egg shells will cause some superficial scratches to the paint and if the egg didn’t break on contact, you may even be left with some minor dents!
What Can You Do?
You essentially have 3 options once you find out someone has egged your car.
Catch Them & Give Them the Bill
If you have security cameras outside of your house or you happen to hear through the grapevine that certain individuals are responsible for the damage to your car, you can opt to take them to small claims court and have them foot the bill.
This may not be an option for everyone, as it requires a bit of detective work. But if the possibility exists to find out who did, this is your best course of action.
File a Claim Through the Insurance

If you have comprehensive coverage, acts of vandalism may be covered. Call your insurance company and see if they will pay to repair the damage. At the very least, they may be able to give you information about local repair shops they work with.
Repair the Damage Yourself
As much as repairing the damage yourself seems like a headache and isn’t exactly fair, sometimes it is the only option for most people.
If the issues aren’t severe, it could be as quick as an afternoon project. But for extensive damage, you should seek the help of a professional and shop around for pricing.
Egg Removal Guide
Work Quickly at First
If you’ve chosen to repair the damage yourself, your first step is to remove as much of the egg as possible. The longer it has to sit and work its way into your paint, the more severe the damage will be.
Eggs don’t take long to start causing damage. Within 2 hours, it can cause permanent damage and can completely eat through paint within 24 hours.
Soak with Hot Water
You want to try and soften up the egg mixture as much as possible before you start removing it. Grab several buckets of hot water and pour them over all the areas that are affected. Repeat 2 or 3 more times.
Gentle Spray
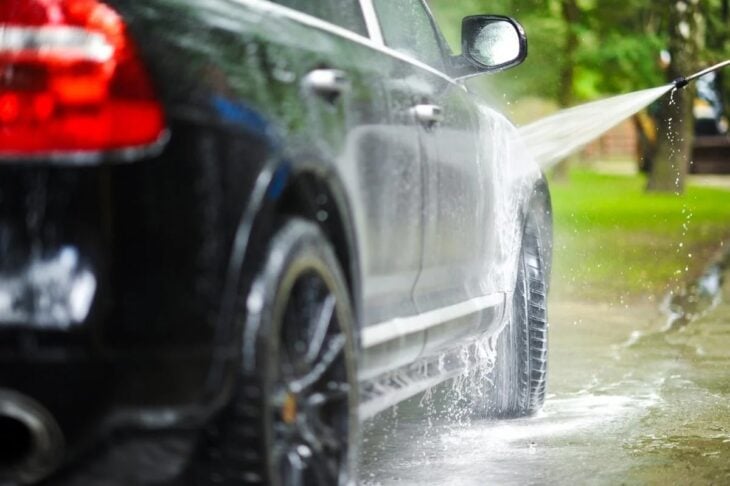
After your hot water soak, use your hose to gently spray the egged areas with just a small amount of pressure. Attempting to pick off or force off stuck pieces of eggshells could result in paint being chipped off.
Not that you’ve soaked it, you can take your time with this step. Be very gentle to avoid further damage.
Stop & Assess
At this point, you’ve worked quickly enough to remove as much egg as possible with just water. Take a moment to assess the damage to your car and its paint. If the egg is coming off fairly easily with no underlying paint problems, you are probably safe to continue removing it yourself.
However, if you notice multiple paint-chipped areas and scratches, you need to make a decision on whether you are going to repair the paint yourself or take it into a body shop to have it professionally fixed.
Car Paint Damage Repair Guide
If you are taking on this project by yourself, immediately continue the process – don’t wait until later.
Vinegar Spray

To further break down the egg components, fill a spray bottle with distilled white vinegar from your kitchen and spray it on the remaining bits of egg. Allow it to sit for a few minutes before gently wiping away the vinegar and egg.
Don’t let it sit too long as vinegar can cause its own damage to a car’s paint, especially if it hasn’t been waxed recently. 2 or 3 minutes should be sufficient. Repeat this process until all egg is removed.
Before you move onto the next step, make sure all eggshell pieces are gone.
Regular Wash
Next, wash your car as you normally would with car soap and water. Use gentle pressure in a circular motion with any wash mitt – you don’t want to rub in any missed eggshells as that will cause more scratches.
Spray completely clean and dry it with a microfiber cloth. If you notice parts of the egg are still stuck to your car, you will need to give it another wash. You can’t begin the process of repairing damage until all the egg is gone.
Assess Scratch Damage
After your car is completely dry, determine how deep the scratches and crazing are. Run your nail gently along the scratch – if it catches, you will likely need some touch-up paint. If it doesn’t catch your nail, then the damage is in the superficial clear coat layer and can be polished out.
Touch Up Paint (If Necessary)

There are several different manufacturers that will sell your car’s paint color in a touch-up kit. The paint code can usually be found inside your door jam on the driver’s side.
The good news is that even if you have to wait a few days for it to arrive, once the egg is removed you are no longer under the gun to fix it as fast as possible.
Apply it as described by the manufacturer and allow it to dry completely before proceeding to the next step (at least 24 hours).
Polish
After your paint has dried (if you need it) the next step is to polish and buff it like normal with your choice of compound.
If you don’t need any touch up paint, then you will only be polishing out clear coat scratches which is a fairly easy process.
You can purchase a clear coat repair kit or use some 3000-grit sandpaper, a polishing compound, and a polishing disc. First, lightly scuff the surface around the scratch with the sandpaper to smooth out the edges of the scratch then gently brush away any residue.
Then apply your polishing compound per the instructions with a disc, either handheld or orbital, until the scratch is no longer visible.
At this point, your car should look as good as new after its unfortunate run-in with some vandals. For the future, set up security cameras with motion-activated lights or park your car in a garage if possible.