
That cramped spot behind the toilet is one of the most difficult spots to paint! How do you reach back there, anyway? We’ll look at two simple ways to paint behind the toilet without removing the toilet tank.
Painting around and behind a toilet can be accomplished with either mini rollers or a paint swipe, also called a paint pad. A paint swipe can either be purchased or constructed from materials around the house. Before painting behind the toilet, clean the area, repair drywall, wrap the toilet in plastic, and tape off the trim.
Table of Contents
How Do You Paint Behind a Toilet?

There are two simple methods to paint behind the toilet.
Use a Mini Roller
The first method involves a small roller that can fit behind the toilet. Sometimes, a brush is needed too to reach every nook and cranny.
Use a Paint Swipe
You can buy a paint swipe online or from a paint store. Alternatively, you can make a paint swipe from common materials around your house. Either way, it is a good way to spread paint down behind the toilet.
Before You Start Painting

There are a few steps that need to be completed before painting can begin.
Materials Needed
- Large plastic bag
- Painters’ tape
- Tarps
- Cleaning supplies
- Drywall compound
- Primer
Step-by-Step Instructions
1. Clean the Area
You are about to get really up close and personal with your toilet. Make sure the area around it is thoroughly cleaned. Clean the wall behind the toilet, as well, before you apply paint.
2. Wrap the Toilet in Plastic
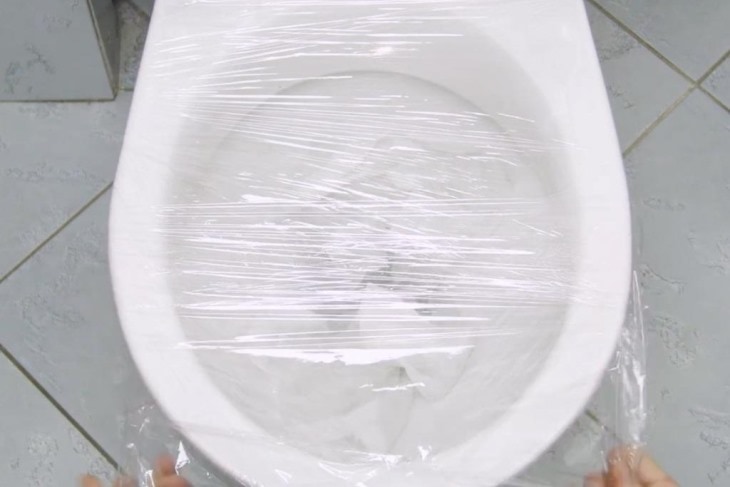
Wrap the plastic bag tightly around the backside of the toilet. Secure it with painters’ tape. Place a tarp or dropcloth on the floor to catch any spilled paint.
3. Tape Off the Edges
Tape off the baseboards and any other areas that you don’t want to get covered in paint.
4. Make Any Necessary Repairs
Patch any holes in the walls with drywall compound and wait for it to dry. Once the compound is dry, sand it down, and cover the areas with primer. Wait for the primer to dry completely before you start to paint.
The Mini Roller Method to Paint behind a Toilet
This method doesn’t require any extra equipment, but it may be difficult to reach the entire wall space behind the toilet.
Materials Needed
Step-by-Step Instructions
1. Paint along the Trim
Use a brush and apply a coat of paint along the taped-off trim.
2. Paint Behind the Toilet
Use the small roller to apply paint behind the toilet as far as you can reach. The paintbrush may come in handy to reach some of the difficult spots.
There will be a small area directly behind the tank that you will most likely not be able to reach. That’s all right! No one will be able to see it.
3. Apply a Second Coat
Apply a second coat of paint once the first coat dries. If you are doing a drastic color change or your paint coverage seems thin, you may need a third coat of paint.
The Paint Swipe Method to Paint behind a Toilet
Using a paint swipe is a great method to reach the entire area behind the toilet without removing the tank. A paint swipe can be purchased, or homemade from common materials.
Materials Needed
- Paint pad or paint swipe, or a homemade paint swipe from the materials below
- Paint stir stick
- A piece of cardboard
- A piece of soft fabric that is at least 6 inches by 6 inches
- Paintbrushes
- Paint
Step-by-Step Instructions

1. Construct the Paint Swipe
If you don’t have a purchase paint pad or paint swipe, make one yourself! Cut a piece of cardboard into an approximately 5-6 inch square. Wrap the fabric around one side, taping it securely to the back of the cardboard with painters’ tape.
Next, attach the paint stir stick to the backside of the cardboard with more tape, or hot glue. Make sure it is secure.
2. Paint along the Trim
Use the paintbrush to apply a coat of paint next to the taped-off trim areas.
3. Use the Paint Swipe Behind the Toilet
Carefully dip the paint swipe into a tray of paint. Make sure to scrape off extra paint. A fabric paint swipe will not absorb as much paint as a roller. Slide the swipe behind the toilet and paint from side to side.
Dip the swipe into the paint, and keep applying paint until the entire area is covered.
4. Apply a Second Coat
Allow the paint to dry, then apply a second coat to maximize coverage.
Final Thoughts
You don’t have to be a contortionist to paint behind the toilet! Use one of these two easy methods to give your bathroom a flawless coat of paint!