Decor styles and preferences can change over time. Or, you may have moved into a new home, and the style is not what you would desire. Maybe you started to prime something and changed your mind.
No matter the cause, you have primer on a surface, and you want to remove it! What does it take to remove primer from different surfaces? How do you do it? This guide will show you how to restore primed surfaces with the right tools and a little bit of hard work!
Table of Contents
What is Primer?

The main difference between primer and regular paint is that primer seals the surface of whatever it is applied to, and paint does not. Good news! Primer and paint require the same effort and tools to remove.
What Will You Need to Remove Primer from Different Surfaces?
The process for primer removal is similar for different surfaces, but you will need different chemicals depending on the surface.
Concrete or Brick
To remove primer from brick or concrete, you will need a paste-like, caustic paint remover, like this one. Make sure you get a paint stripper that is designed for masonry! Brick can be fragile. For a complete guide to removing paint from brick, check out this article!
Drywall
It is not necessary to remove primer on drywall before painting. Just paint or prime over it! If the primer affects the texture of the drywall, use a piece of sandpaper to lightly sand down the primer before you paint.
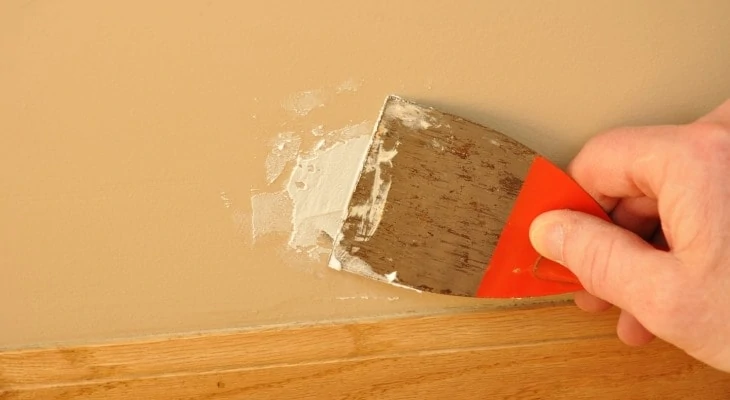
Wood
Removing primer from wood takes a gentle touch. Strong chemicals can damage the wood. Use a biochemical paint stripper with plant-based ingredients. This will be gentle on your wood surfaces, but should be strong enough to remove the paint. This type of paint stripper probably won’t be effective on tougher surfaces, like concrete or metal.
Plastic
A heavy-duty paint remover will strip the paint right off of plastic! Just make sure you test the remover on a small area first. Some paint removers will melt plastic.
Metal
Metal doesn’t require a gentle touch like wood! Feel free to use a heavy-duty paint remover on metal. A drill-mounted wire brush works great to really sand off the paint and smooth out any bumps in the metal.
How to Remove Primer – Step-by-Step Instructions
Materials Needed
- A paint face mask and eye protection
- Thick, rubber gloves
- Drop cloths to protect the surrounding areas
- Paint remover of your choice, depending on the surface (see above)
- Plastic sheeting or laminated removal paper (optional)
- Sandpaper, or an orbital sander
- Putty knives
- Wire brushes
- Mineral oil (if using Citristrip, or a similar product)

Suit up!
Put on your mask, eye protection, and gloves. If you are working with any kind of chemical paint remover, it is best to wear a mask with a filter. Don’t breathe in the fumes!
Read the instructions on your paint remover carefully to make sure you understand all directions and safety precautions. Make sure to wear long sleeves and long pants, especially if you are working with a caustic paint remover.
If at all possible, choose to work in a ventilated area. An open garage is ideal. If that isn’t a possibility, open all the nearby windows.
Protect the Surrounding Area
Place drop cloths or plastic sheeting around your work area to keep paint remover off of nearby surfaces. If necessary, use painting tape to attach plastic sheeting to the bottom of the work surface.
Scrape off Loose Paint
Use the putty knives to scrape off any loose paint before you apply the paint remover. If your project is outdoors, use a power washer to blast the paint away.
Wash the Surface
Dish soap and water work well to remove dirt and build up! Scrub the area, rinse it with clean water, and allow it to dry.
Apply the Paint Remover

Read the guide above to determine which type of paint remover you need for your surface. Test a small corner of the surface before you continue. If the surface reacts well with the solvent, then continue to apply the paint remover all over the entire primed surface.
Follow the instructions on the paint remover for application. Don’t be hesitant to spread it on thick! I recommend a disposable paintbrush for application. Keep applying the solvent until it reaches the recommended thickness.
Apply Plastic Sheeting or Laminated Removal Paper
This is an optional step. Check the instructions on your paint remover. Some paint removers work best with this step, especially if you are removing primer from brick or concrete. If your remover suggests plastic sheeting, place the sheeting over the paint remover while it is still wet.
If you are working on a large area, it may be easier to cut the sheets into one foot by one foot pieces. Apply paint remover to a one foot by one foot area, then immediately place the plastic sheeting. Move onto the next section.
Wait for the Paint Remover to Soak in
It can take anywhere from 30 minutes to 12 hours for the solvent to soak through the primer. Check the instructions. Test a small, inconspicuous area, first. If the primer does not come away easily, leave it a little longer.
The time you need to wait depends on several variables:
- The type of surface: Porous materials, like brick, require more solvent and a longer waiting time.
- The amount of primer: If there are multiple layers of primer, the paint remover will take longer to soak through all the layers.
- The age of the primer: Older primer has had time to ‘cure’, and may be more difficult to remove.
- The type of paint remover: The more caustic the paint remover, the less time you have to wait. However, more caustic removers can cause damage to some surfaces and may put off dangerous fumes.
Remove the Primer
Don’t forget to put your protective gear back on! If you used plastic sheeting, or laminated sheets, carefully peel them away. If you didn’t use sheets, just start scraping!
Take your putty knife, and begin to scrape away the layers of primer and paint. This part requires some elbow grease! Place your scraping tool at a 20-degree angle and work across the surface. A blade may work better on plastic or metal surfaces.
Once you’ve scraped everything that can be scraped, use a wire brush to remove the rest of the primer.
Thoroughly Rinse the Surface
Make sure you have removed all of the paint remover! Thoroughly rinse the entire area with water. Check the instructions on your paint remover. Some paint removers, like Citristrip, need to be rinsed with mineral oil. Allow the surface to completely dry before repainting.
Repeat the Whole Process, If Necessary
If there is still a stubborn primer stuck to the surface, you may need to repeat the process. Try a thicker layer of paint remover, and leave it on a little longer.
Final Thoughts
Paint and primer removal requires elbow grease and a lot of patience! Choose the right paint remover, and follow all instructions for the best results. If you stick with it, you will enjoy the results for a long time to come!