Painted cabinets are all the rage in today’s home decorating magazines and for good reason! Painted cabinets can completely transform a room – light colors can make a room feel open and airy, whereas dark colors can make a room feel warm and cozy.
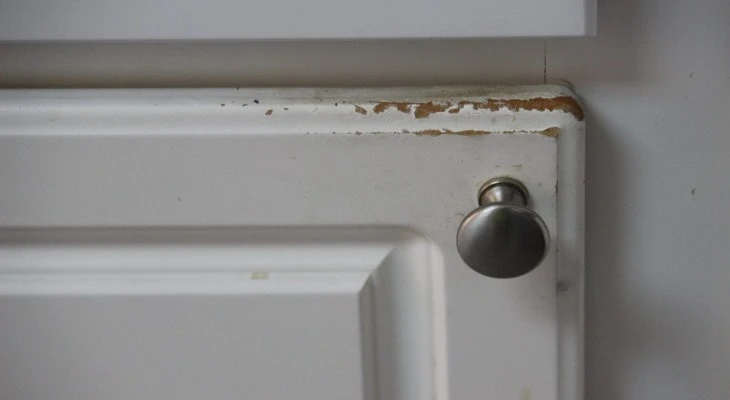
However, chipped cabinets make a room feel drab and dirty. This is why it is of the utmost importance to take proper care of your cabinets before, during, and after the painting process.
You can keep your freshly painted cabinets from chipping by following a few simple upkeep tips:
Firstly, avoid opening and closing them too quickly. Next, make sure the handles and other hardware are screwed in tightly. You can also apply bumpers to the inside of cabinet doors (clean the area with isopropyl alcohol first) for added protection. Lastly, clean your cabinets with a multi-purpose cleaner at least twice a month.
Table of Contents
Before the First Paint
Before starting the painting process, it is absolutely crucial to sand down your cabinets and inspect them for any holes or gaps.
Sanding

To sand kitchen cabinets, I have used a sanding sponge and self-stick sandpaper for more intricate areas. This will help to smooth the surface and remove any uneven paint previously applied.
Wood Glue
If your cabinets have any gaps, you can easily fill them in with wood glue. Allow the wood glue to dry for 24 hours before continuing the process.
Cleaning
After you complete the sanding process and have let the wood glue dry, be sure to dust off all of the wood grains so that you will have a smooth surface to paint. You do not want to have tiny particles of wood in the paint because this will cause paint to go on the surface unevenly and chip later on.
You can use an air compressor or a vacuum cleaner to easily get rid of all of the wood grains. Alternatively, if you do not have access to either of these, you can use a damp microfiber cloth or a painter’s brush.
Primer
Once you have a clean surface, use a primer for both wood and laminate cabinets before applying paint. This will help the paint stick to the surface. Selecting a high-quality primer will save you both time and money in the long run. Depending on the type of primer you choose, it can take anywhere from 1-8 hours to dry.
Painting

After the primer has dried, you can begin the painting process. Start by painting one coat, allowing the first coat to dry, and then painting a second coat to ensure a lasting paint job.
Latex Paint
Although latex paints typically take about 1 hour to dry, it is recommended that you wait a minimum of 4 hours before repainting.
Oil Paint
Oil-based paints typically take about 6 hours to dry. It is recommended that you wait a minimum of 24 hours before applying a second coat.
Extra Painting Tip
Most paints and primers dry quicker in a warmer environment. Try turning the temperature in your house up a few degrees, or plugging in a heat lamp if you have one handy.
Top Coat
Once your paint is completely dry, add a clear top coat to help protect your kitchen cabinets from easily chipping and provide lasting protection. If you are planning on painting your cabinets white, be sure to find a top coat that is anti-yellowing.
What If They Are Already Chipped?
If your cabinets are already chipped, fear not! You can simply sand down the affected area, clean with soap and water, and re-paint. Again, the key is to use a high-quality primer (such as this one), allow each layer of paint to fully dry, and apply a top coat.
Tips for Upkeep
If you already have beautifully painted cabinets, you can ensure that they will last by following a few simple tips.
Use of Cabinets
Although we are often in a rush, it is important to avoid opening and closing the cabinets quickly. This may cause the cabinet doors to slam against one another and eventually chip the paint. I would also recommend opening one cabinet at a time to avoid paint chipping.
Hardware
Ensure that the hardware on your cabinets are screwed in tight enough. If you have loose handles, this can cause the paint to scratch or peel over time. Check your hardware monthly because pieces can loosen over time.
Bumpers

Apply bumpers to the inside of cabinet doors by cleaning the inside of the cabinet with isopropyl alcohol and then pressing the bumper down firmly.
Rubber Bumpers
Rubber bumpers are typically cheaper and come in larger packs.
Felt Bumpers
Felt bumpers are more costly, but do not have to be replaced as often as the rubber ones and are less likely to cause the paint to peel off.
Clean and Clean Often
Oils from our hands as well as dirt and grime can shorten the lifespan of our painted cabinets more than we realize. Grime can quickly harden and bind to the paint, eventually causing the paint to chip off when we do finally attempt to clean it.
Be sure to clean your cabinets with a multi-purpose cleaner or a damp cloth and dish soap at least bi-weekly. Although cleaning cabinets can be a time-consuming process, it can save you time in the long run. Otherwise, you may be looking at having to re-paint your cabinets.
The Cleaning Process

Start by removing all items out of the cabinets. Wipe down the inside of each of the cabinets first. Once the insides of the cabinets have dried, you can place the items back inside.
Be sure to rinse out your cleaning rag or grab a new one often so that you are not dragging dirt and grime along from one cabinet to the next.
Shining
If you have wooden cabinets and want them to shine, you can mix white vinegar and warm water and apply this to your cabinets with a soft cloth. Alternatively, if the smell bothers you, you can splurge for a wood polishing spray.
Closing Thoughts
Painted cabinets make a statement in any home. It is up to you to decide if the statement will be a positive or negative one.
Following these tips during and after the painting process will ensure that you, the homeowner, are pleased with your cabinets for years to come.