Spray paint is such a popular DIY product because of its ease of use. With a wide variety of colors and finishes in an easy-to-use shake-and-spray can, it is easy to see why so many crafters love spray paint.
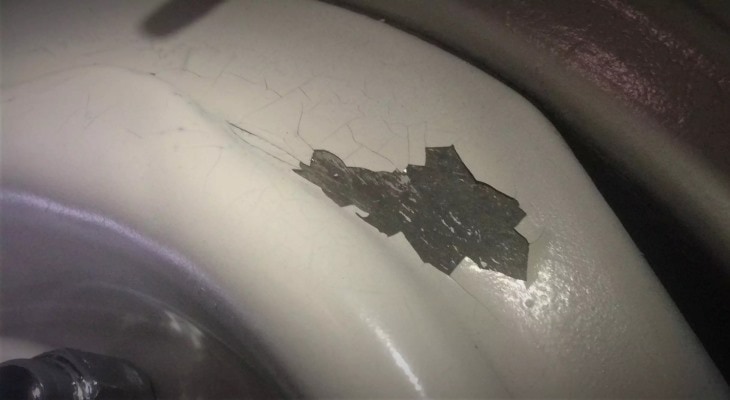
But just because it is simplistic in its design doesn’t mean that issues can’t arrive from a spray paint application. One common problem is called crackling or cracking. It’s where you can visibly see the paint pulling apart on the surface and sometimes even bubbling up.
There are several culprits that could cause crackling in spray paints, but it is also helpful to learn a few ways to prevent cracked paint in the first place. So I’ll go over a few spray paint problems and solutions.
Table of Contents
Why is My Spray Paint Cracking?
To understand what mistakes need to be avoided in your future projects, it is important to understand what might have caused the spray paint to crack in the first place on your current project.
Too Hot or Too Cold
Paint can be finicky if not applied in the right conditions. If the temperature is too high or too low, it will cause issues with drying and moisture evaporation.
Too cold of temperatures will prevent the paint from being able to adhere to the surface properly. It will also cause the top layer to dry faster than the paint underneath, causing it to “pull” and eventually crack as it does dry.
If the temperature is too warm, the paint will not dry as quickly. This can be a problem if you are using multiple coats because if the underlayer does not dry before you apply a second coat, the same issue of the top layer drying first will apply.
Also, temperatures that are too high will cause some solvents to evaporate quicker, thus affecting the overall adhesion. Always check your spray paint can for the recommended temperature range.
Coats Are Too Thick
Thicker coats will take longer to dry and are more prone to dripping. Not only that, but once again, the issue of the top layer drying before the bottom layer will rear its ugly head and make the paint more prone to cracking.
Also, an issue similar to cracking to “orange peel” or pitting. Making your coats too thick can cause small pockmarks in the finish, and the pockmarks could eventually pull away and separate from the surrounding paint.
You Didn’t Use Primer
In order to achieve a smooth finish, you need to have a smooth surface with good adhesion potential. Primer is the product that helps you achieve that.
If you are spray painting an object with natural slip (such as plastic), you absolutely need to use a primer, so your paint has something to grab onto. Without it, it will start to peel away from the surface & cause small imperfections that get more noticeable over time.
Mixing Paint Types
There are several different types of bases and formulations for spray paint, and not all of them mix well. For instance, mixing an acrylic with an oil-based paint will cause unwanted chemical reactions and an unsightly finish.
That’s not to say you can’t mix spray paints. For instance, you may use one color for the bottom layer and another for the top to achieve a custom hue. Just make sure that they are the same type of paint, e.g., acrylic with acrylic, oil with oil.
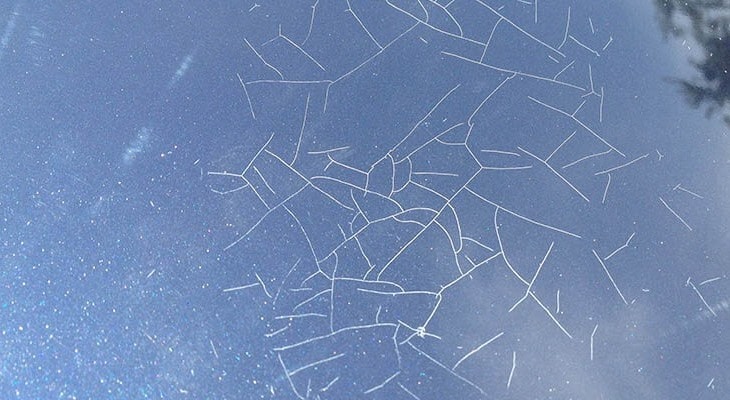
Humidity
Too much moisture in the air will affect adhesion. It can also end up mixing minute amounts of water into the spray paint, thereby throwing off the carefully crafted ratios and causing issues with layering.
If it is too dry, the paint will start to lose the moisture that it needs to keep the integrity of the finish. It will become brittle which will cause flaking and cracking.
Top Tips For Prevention
Proper Environment
The easiest thing to tick off of your prevention checklist is to ensure that you are applying the paint in the ideal environment. Make sure it is not too hot or too cold, and be sure to check the recommended application temperature on your paint can.
Spray paint should be applied in a well-ventilated area that has a moderate temperature and a moderate level of humidity. It is okay to apply it outside, just make sure there are no temperature extremes and keep the item out of direct sunlight to avoid heating up the paint.
Use a Primer
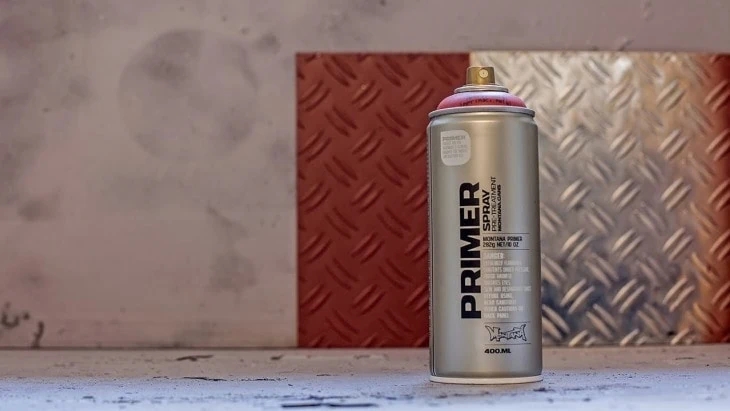
Do yourself a favor and save the headache of poor adhesion. Grab a spray primer that is specific to the material you are painting (wood, metal, plastic, etc.).
Make sure you apply it in an even layer and give it plenty of time to dry completely before applying your paint. You may need to sand the object lightly for the primer to stick.
Layer Correctly
Hold the can far enough away from your object to give a thin, even coat. Work quickly and in short sections. Overspraying an area will make the paint too thick and can lead to cracking as it dries.
Also, allow each layer to dry completely before adding any more paint on top. This includes touch-ups as well. Ensure that you are using the same base of paint if you are using multiple colors, as mixing them could cause chemical reactions in the solvent of each paint type.
Sand If Necessary
Sanding between spray paint coats is not always needed, but it can help to fix minor imperfections along the way and prevent you from having to start all over.
Lightly sanding can help smooth out drips and pockmarks that aren’t severe. It also roughs up the surface slightly so that your top layer won’t have any issues with adhesion. You’ll also be able to tell if your primer is doing its job.
Make sure you allow your previous layer of paint to dry fully before you attempt to sand. This might end up extending the time it takes to complete your project, but if you are a perfectionist, it will be well worth it.
Fixing Cracked Spray Paint
If you are already finished painting, and you realize that one of the aforementioned factors could have been the cause of it, it is still possible to salvage your project, depending on the severity of the cracking.
Cracked Top Layer
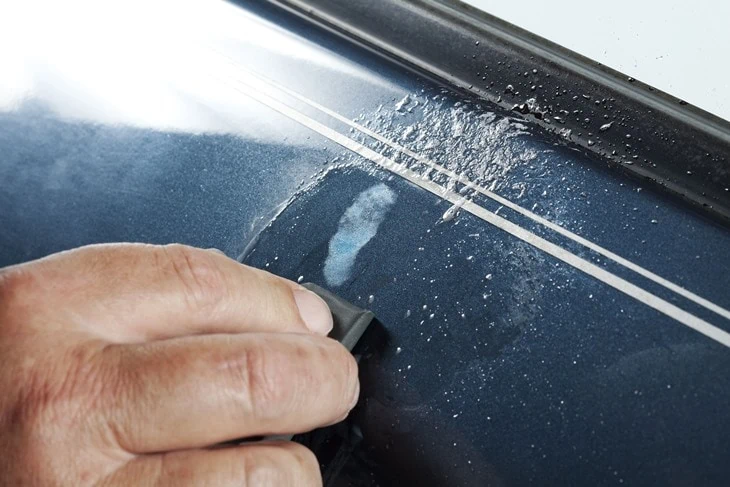
If only the top layer is beginning to crackle, you can sand out the cracks gently and then reapply the top coat. Even if you notice it before it is fully dried, you should allow it to finish drying before you sand it, or you will have a mess on your hands.
All Layers Are Cracked
This is a bit more tricky to fix. If you notice it in only one area, you can spot-treat that area with sanding, priming, and painting again. But if the underlying object can be seen, then you will need to start at square one.
The most likely culprit, in this case, is your primer (if you used one) because a visible original object means the primer didn’t stick correctly. Sand off the paint and sand the surface of your object again before restarting the process.