
It’s a surprisingly common issue for homeowners and painters to have difficulty getting touch-up paint to match the original paint on the wall. There are a few reasons why this may happen, but the underlying question that you may have is – “How do I fix it?”.
It is the easiest to get touch-up paint to match your walls if you are using the original paint formula and color. It may be necessary to thin the paint, smooth the wall, or repaint a larger section than intended in order for touch-up paint to blend successfully.
You’re going to need to be thorough with this process because cutting corners on touch-up paint can lead to even more work down the road.
Table of Contents
Reasons Why Your Touch-up Paint isn’t Matching
It’s best to examine the area and paint before applying it to your wall, but if you’ve done that and you still don’t have a perfect match and blend, there could be a few different reasons why this is happening.
You Used a Different Kind of Paint
This is probably one of the more obvious reasons, but it’s still often overlooked. Each batch of paint is blended with a certain amount of pigments and if you don’t get that formula right, there will be a noticeable difference.
It’s always recommended that you keep the original paint used to paint the walls so you will have batch consistency when doing touch-ups. If you need to use the whole can, retain the label with brand and color in case you need to get more in the future.
You Used Paint That Was Too Old
Ok, so you did your touch-up with the original batch of paint from the original can and it’s still not matching. Now what? Well, it could be that the original batch was older than 2 years, which is the average shelf life of most paints.
Paint that has sat on a shelf for more than 2 years will start to lose its moisture. Less moisture means a higher concentration of pigment. So when you go to do touch-ups, you’ll notice the touch-up paint is darker than the original color.
Take your original paint to your local hardware store and have them color match it with a new batch. To prevent your original paint from losing moisture, be sure to store it in a cool, dark area and make sure to properly seal it after use.
You Didn’t Apply the Touch Up Correctly
By “correctly”, I mean with the same tools and consistency as the original coat. If the original coat of paint took 3 coats and you applied 2 coats, your touch-up paint will be lighter than the original. The same goes for applying the touch-up paint with a different nap roller.
For touch-up paint to blend seamlessly, the paint and the application need to be as similar as possible.
You Used a Different Finish

Did you use high-gloss paint to touch up an eggshell wall? Even if you got the exact color correct, using a different finish for a touch-up job will stick out like a sore thumb. You’ll end up with an obviously shiny or matte section on your wall.
Check the label of the original paint to match them correctly. It’s important to note that higher gloss paints are more difficult to touch up than flat or eggshell finishes.
The Room Doesn’t Have Ideal Conditions
Just like putting on the first coat of paint, the room and the wall need to be ready and prepped. If you are touching up over a drywall repair that wasn’t sanded, the final result won’t look how you want it to.
The same concept goes for room conditions. If the room is too cold, too humid, or too dusty, paint won’t properly adhere or dry.
Will Touch-up Paint Eventually Blend In?
Unfortunately, there’s no true answer to this question. Paint does tend to look darker when you first apply it, so it may be a matter of waiting until it is fully cured to see how well it blends. If it’s slightly too light, another light coat may be all that’s needed.
But if the paint has fully cured, and you notice the sheen and texture are off or the color is too dark, you will need to redo the area to get the touch-up paint to blend correctly.
How to Blend Touch-up Paint on a Wall
Having a good base is essential to getting touch-up paint to blend seamlessly on your wall. Before you start, make sure you have sanded (if necessary), cleaned, and primed the area.
Use the Same Paint and Tools

If at all possible, use the same batch of paint. If it’s an older batch, remove the film that has formed on top. Stirring it in will increase the chances of a color mismatch. If your paint is older than 2 years old, mix in about 5% of water to account for moisture loss.
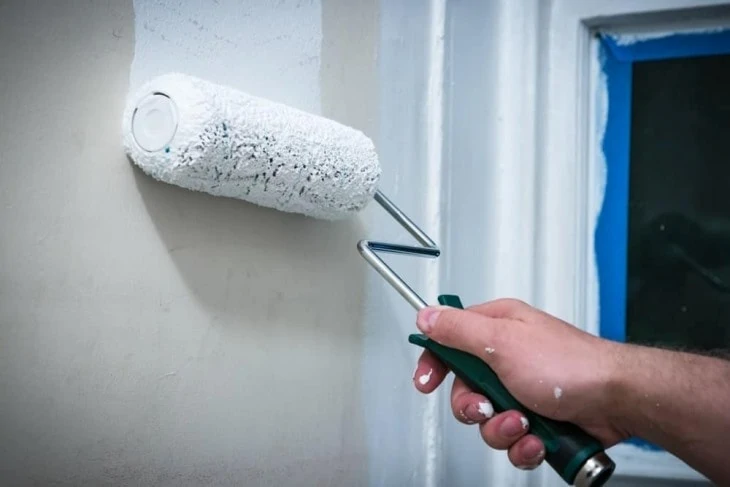
Use the same nap roller that you used for the original paint job. Also, be sure to apply light pressure to avoid making your coats too thick.
Feather Your Paint
As you get near the edge of the touched-up area, feather the paint lightly so it blends in. Don’t overdo it though, or else you will be adding a third coat of paint to areas beyond the touch-up and will get a “halo” effect.
Allow Proper Dry-time Before Assessing
Don’t get nervous if the touch-up job isn’t looking perfect shortly after applying it. Give it time to cure before putting on another coat. If it’s too dark, you will need to remove the paint, thin it and start over. If it’s too light, put on another light coat.
Final Thoughts
Touch-up paint jobs are never an easy task. With all the variables that exist to ruin a touch-up job, it certainly takes a bit of finesse to get it just right. Take precautions beforehand and you’ll be able to touch up any areas on your wall with minimal effort.