Painting trim next to carpeting is difficult. However, it can be done right! If you have ever tried to paint next to carpeting and wound up with a mess, this article is for you!
Table of Contents
What Are My Options for Painting Baseboards with Carpet?

Examine the baseboards and the carpet before you get started on this painting project. Determine the thickness of your carpet, and whether there is a gap between the baseboard and the floor. This will help you decide which option is best for painting your baseboards.
Remove the Baseboards
If you don’t have any gap between the subfloor and the bottom of your baseboards, it can be really difficult to paint baseboards with carpet.
Removing the baseboards may be a good option. However, removing baseboards without damaging the baseboards or the walls can be tricky. You will also need to note where each baseboard was originally located for reinstallation.
Peel Back the Carpet
Another option for difficult to paint baseboards is to peel back a small section of carpet. There should be a thin strip of wood next to the baseboard where the carpet is attached. This is called a tack strip. Remove the tacks and peel the carpet back from the baseboards. Paint the baseboards, then reinstall the carpet.
Paint the Baseboards with the Carpet in Place
Painting the baseboards while they are still on the walls with the carpet in place is probably the least disruptive option. It can be tricky, though!
Paint can get on the carpet, or fibers and dust from the carpet can get stuck to the baseboards. This look is not ideal. Keep reading to find out how to execute flawlessly painted baseboards with carpet!
How Do I Paint Baseboards with the Carpet in Place?
It is possible to have perfectly painted baseboards and keep your carpet clean at the same time!
Materials Needed
- Painters tape (use 2-inch or 3-inch wide tape)
- Carpet shield
- Putty knife
- Sanding block
- Spackle
- Caulk
- Caulk tools (optional)
- Vacuum
- Trim paintbrush
- Primer
- Semi-gloss or gloss paint for trim
Here’s the step by step guide.
Clean Around the Baseboards
Thoroughly vacuum the baseboards and along the carpet where it meets the baseboard. Wipe down the baseboards with a damp cloth.
Place One Edge of Tape onto the Baseboard
Press the carpet back from the baseboards. Rip off a piece of painter’s tape that is 2-3 feet long. If you get too long of a piece, you will end up with a tangled mess. Lightly place the painter’s tape about half an inch from the bottom of the baseboard. Yes, ON the baseboard. This will make more sense in the next step!
If desired, tape off the wall above the baseboard to keep it free from paint, as well.
Tuck the Tape Under the Baseboard
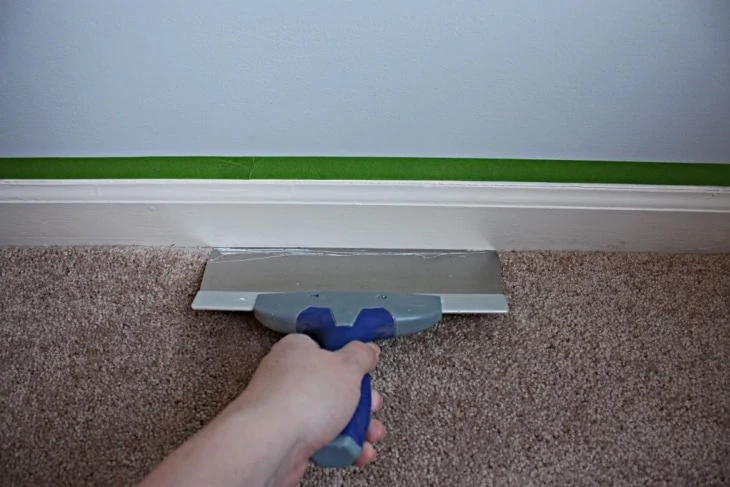
Use one hand to keep the loose edge of the tape flat against the carpet. Use the putty knife to carefully slide the portion of the tape that is on the baseboard underneath the baseboard.
This may take some practice! Once you get the hang of it, it should go more quickly. Continue this process until all the baseboards are taped.
Finish Covering the Carpet
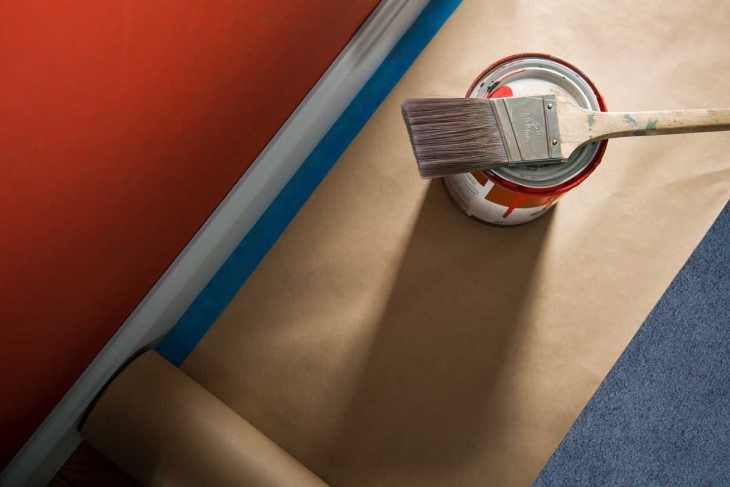
Use another strip of tape, or, better yet, the carpet shield to cover the rest of the carpet near the baseboards. You don’t want any drops of paint on the carpet! If you don’t use carpet shields, place some drop cloths right next to the painter’s tape.
Sand the Baseboards
Lightly sand the baseboards with a fine-grit sandpaper or your sanding block. Once the baseboards feel smooth, wipe away any dust with a clean, damp cloth.
Repair the Baseboards
You want a smooth, clean surface for your paint! Carefully inspect all the baseboards, and make any repairs as needed.
Fill Nail Holes and Gaps
Use the spackle and spackle knife to fill in any nail holes, dents, or dings. Wait until the spackle is completely dry. Depending on how much spackle you used and the type of spackle, this wait time will vary.
Once the spackle is dry, use the sanding block to gently sand the area until it is flush with the rest of the baseboard. Wipe off all the dust from the spackle.
Caulk the Corners
Use caulk in the corners and seams. Apply the caulk, then smooth it with the caulk tools, or, I’ve been known to just use my fingers! Caulking the corners will help give the baseboards a smooth, even look. Allow the caulk to dry completely before you apply paint or primer.
Apply Primer
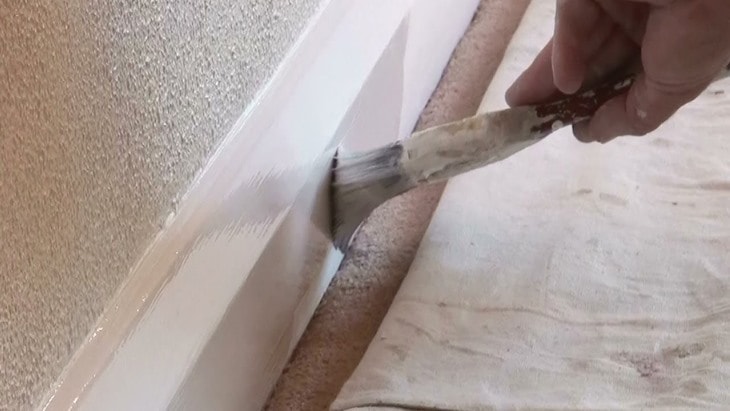
Pick an angled brush to paint the trim. You don’t want a brush that is too wide. Disposable foam brushes are my favorite for painting trim! These foam brushes provide a really smooth finish, and you simply throw them away when you are done painting!
Use the trim brush to apply the primer to the baseboards. Practice using the angle brush or foam brush to carefully apply the paint. Use a steady hand and apply from left to right (if you are right-handed!). Use a damp cloth to clean up any mistakes or splatters. Go nice and slow!
Use the brush to push the paint down into the crack at the bottom of the baseboard. Drag the brush from side to side to smooth out the paint.
If you have the walls taped off, you don’t need to be super careful along the top of the baseboard. Maybe your walls and your trim will be the same color, and you didn’t tape your walls. If this is the case, you will need to cut in.
Cutting in is the term for carefully applying paint (or primer, in this case) along an edge. Scrape all the excess paint off your brush. Use a steady hand to carefully apply a straight line of paint along the top edge of the baseboard. Have your damp cloth ready to wipe up any mistakes.
Let the primer completely dry before applying the paint. Most primers dry within an hour. However, primer is not usually ready for paint to be applied over it until around three hours later.
Apply Paint
Trim paint is usually a semi-gloss, latex paint. This type of paint has a shiny finish. It is durable, and easy to wipe clean.
Use the clean trim brush to apply your trim paint to the baseboards. Use the same method described above for the primer application. Allow the paint to dry. This could take 2 hours or up to 5 hours. Once the paint is completely dry, apply a second coat, if needed.
Touch Up
Carefully inspect all your newly painted baseboards. If you see any spots that you missed, use your paint and paintbrush to touch up the paint. Once all the paint is dry, use the putty knife or a utility knife to cut along the edge of the painter’s tape. Gently pull the tape away from the baseboards and walls.
Final Thoughts
You did it! You completed a neat, tidy, professional-looking paint job on your trim, without getting any paint on the carpet, or carpet stuck to the trim.